It should come as no surprise that one of the most common yoga injuries is that of tender wrists. Certain poses demand a lot of strength from these areas, and as a result, many individuals place too much pressure on wrist ligaments far too quickly. Even worse is that this type of trauma can bring much of your practice to a complete standstill!
Step by Step Guide to Approaching Wrist-Related Yoga Injuries
For these reasons, you should never ignore any nagging aches, and rather slow your training down by carefully following these 10 steps:
1. Wrist Exercises
Your best protection against wrist damage is to start at the source, by focusing on the troubled regions, and building strength within them. To achieve this outcome without risking further harm, start with light weights (around 1-5lb) and perform slow, repetitive curls using your wrist only. These tiny weighted movements are ideal for specifically targeting the necessary muscle groups which yoga relies on.
2. Hand and Finger Exercises
Much like the light weight exercises, you can isolate the wrists’ tendons through hand and finger training. Look into purchasing hand strengthener and stretcher products (such as stress balls or putties) which you can use to build resistance into your grip squeezing routine. What’s great about these small workouts is that you can perform them discreetly wherever you are, just be wary of not overdoing it and causing any additional problems!
3. Warming Up
Despite the imperative role of wrists in yoga, so many practitioners neglect to warm up their wrists, which is a big mistake. Always stretch this area out by pulling your fingers back, then loosen up by rotating your hand around, as well as opening and closing your fist. If you are currently suffering from an injury, soak your wrists in warm water before and after the session, and be strict about your desk posture, perhaps wearing a splint in your downtime.
4. The Correct Surface
If your cushioned yoga mat feels so comfortable that you could easily fall asleep on it, this could be a big part your problem. A thick squishy surface means that your hands may be sinking into the material, which will disrupt the angles of your joints and will not support your frame properly. It’s a much better idea to invest in a thinner mat or even consider practicing on the hard floor beneath.
5. Other Equipment
Cork wedges or foam blocks could become your wrists’ best friend, as they essentially bring the floor further up to you, alleviating the pressure and allowing you to perform your poses easier. You could even incorporate a chair if that’s all you have lying around!
6. Downward-Facing Dog
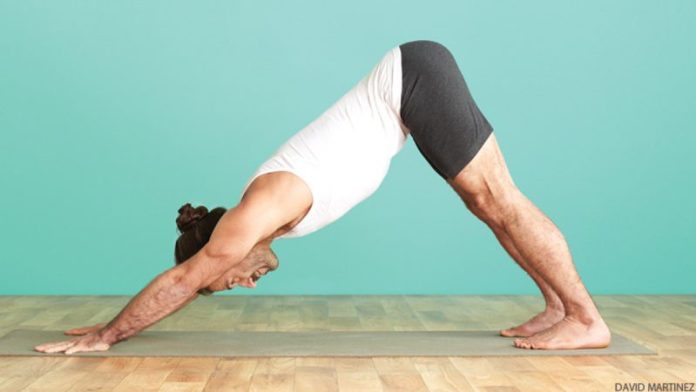
When it comes to carefully practice your poses with wrist concerns, the Downward-Facing Dog is a perfect place to start. This is because your hands are part of the fundamental groundwork, yet you’re also sharing the burden of your body weight with your feet. This allows you to test out your wrists’ current ability whilst giving them a proper stretch at the same time.
7. Upward-Facing Dog/Planking
If the previous Downward Dog move did not strain your wrists, then feel free to progress into either the Upward-Facing Dog or the planking pose, which are highly beneficial for hand stretching. As these positions place additional stress on the wrists, you must pay close attention to any changes you may feel, and if you experience discomfort, immediately drop your elbows or knees to the mat. Remember, this is all about patience.
8. Upward Bow
As before, if the Upward Dog did not bring you any wrist-related troubles, you can move onto the advanced Wheel Pose for some extreme wrist stretching action. If you are struggling to get lift off, ask a yoga buddy to hold your ankles in place, and if you feel like you may have pushed yourself too fast, simply drop your shoulders down into the less intensive Bridge Pose.
9. L-Pose Handstand
Finally, for the maximum yoga wrist workout, place your full body weight onto your arms by slowly walking your feet up the wall from the Downward Dog pose, stopping only when your frame resembles an upside-down L-shape. This process will help build up the necessary strength of your wrists, whilst keeping your balance and alignment in check.
10. Change Position
No matter which poses you choose to try, always be mindful of your body. If certain positions cause you pain, experiment by adjusting your approach, discovering which movements feel more natural to you. Re-angle your wrist, distribute your weight to different areas, try bending your knees, or even turn your flat palms into fists, pushing softly into your foam blocks below. And remember to speak to your instructor first for guidance or alternative options for each pose.
Image source: https://www.yogajournal.com
Also Read :


